A savvy collection of craft projects & tutorials, recipes, & fun things to do with your kids!
Showing posts with label craft tutorial. Show all posts

Saturday, November 24, 2012

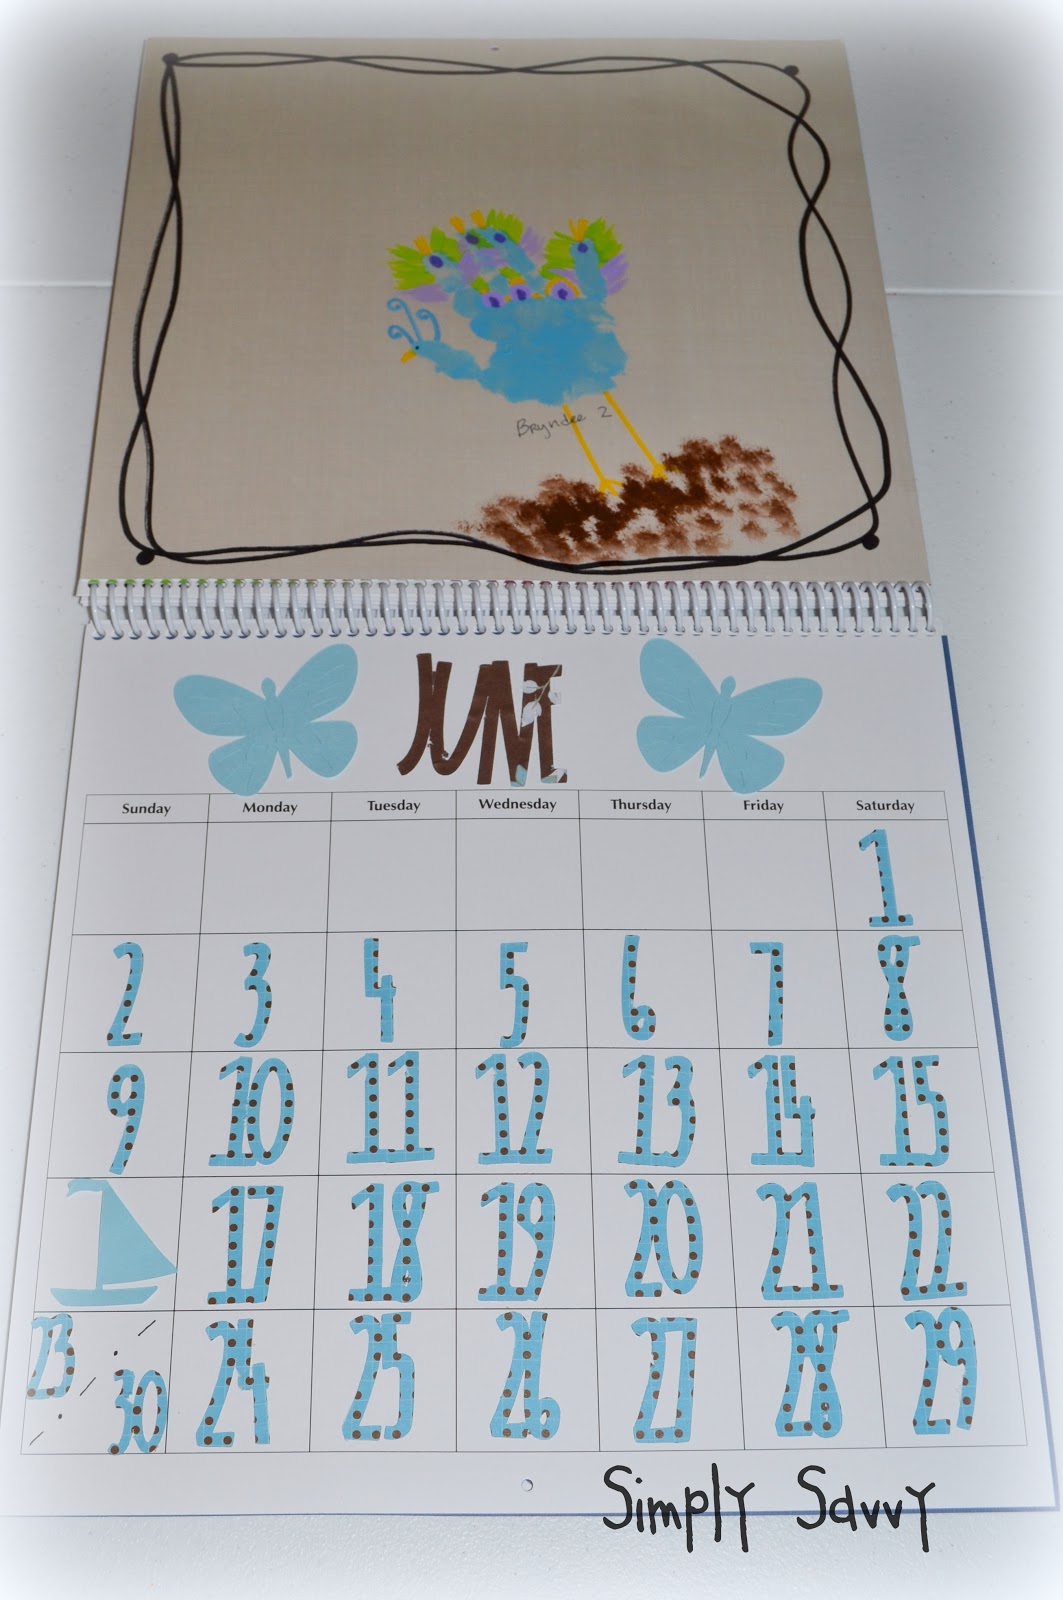
Keepsake Calendar


 Made from hand and footprints, this special keepsake calendar makes a one-of-a-kind, fabulous gift for grandparents. You don't need mad artistic skills (mine are very limited), but this calendar is VERY time consuming. Scroll to the bottom of the pictures for a list of supplies needed and a step-by-step how to.


SUPPLIES:

Bare Accents 12x12 blank white calendar
12x12 cardstock  (see pictures for colors) one sheet for each month
foam paint brushes
small paint brushes
paint markers to add details (I used the Sharpie brand)
acrylic paints (see pictures for colors)
scrapbook paper in various colors (I used papers that coordinated with my monthly painting)
scrapbook adhesive

* I used my Cricut to cut out the months, but you could just as easily do this on your computer. I used the DoodleCharms and Designer's Calendar cartridges.

* I found inspiration for all of my basic handprint and footprint ideas on Pinterest.


INSTRUCTIONS:

Step 1: Use the foam brushes and the acrylic paints for all the handprints and footprints. On my husband's side of the family there are 12 grandkids so I did one child for each month. Allow to dry overnight.

Step 2: Using the smaller brushes and the paint markers, add detail to your calendar pages. I drew a border around each month just to help tie them together.  Allow to dry and adhere to calendar.

Step 3: Using your die cut machine, computer, or what have you, cut or print the months and the days. For each major holiday I used a fun cut-out rather than a number. Also, half way through the year I started printing my numbers on cute scrapbook paper and then used Stampin' Up punches to punch out the numbers. This was WAAAAY faster, and I think I might like the way it looks a tiny bit more, too. Adhere all pieces to calendar.

I would love to see pictures of how your calendar turns out!


Sunday, November 27, 2011

Simple Handprint Snowman Keepsake Ornament

I wanted to come up with a super cute, yet cost effective, keepsake ornament that my preschoolers could give to their parents for Christmas. This would also be a cherished gift for grandparents.

Supplies Needed:

Clear plastic ornaments (I found a 4 pack at Michael's for $2.50)
Silver Tinsel
White acrylic paint
sponge paint brush
paint markers in black, orange, and other assorted colors for the scarfs (I used the Sharpie brand)
spray sealer
ribbon
poem


Step 1: Wash and thoroughly dry child's hand. Use the sponge paint brush to apply a good amount of the white paint to child's palm and fingers.

Step 2: Set the ornament on the child's palm and have him close his fingers around the sides of the ornament. Allow the ornament to dry.

Step 3: Fill the ornament with tinsel.

Step 4: Using the paint markers, add detail to the snowmen. I did a face and buttons on every snowman, and added a top hat and scarf to every other snowman. Allow to dry.

Step 5: Spray a coat of clear sealer on the ornament and allow to dry overnight.

Step 6: Attach a copy of the following poem to the ornament with a ribbon:

Five Little Snowmen all in a line,
They might look familiar because the handprint is mine.
Snowmen will melt cause they're just made of snow,
Cherish this handprint because I will grow!

Have the child add his name and the year on the bottom of the tag.

That's it! A fabulous keepsake any parent or grandparent would love!


Tip Junkie handmade projects

Link Party

Wednesday, June 23, 2010

Blog Planning Notebook Tutorial & Printable

Organize your blog posts with this super cute, fun to make, blog planning book.


1. Download and print off the worksheet, found below.

2. Cut each page in half (5.5 inches.) I ran 125 copies giving me 250 pages for my book. Set aside.


For this planner I used paper from My Minds Eye be.loved collection.

3. Cut two pieces of cardstock measuring 6x9. These will be your front and back covers.


4. Cut patterned paper to 4x6 and adhere to the top of your front cover.


5. Cut coordinating patterned paper to 5 1/2x6 and adhere to the bottom.


6. Cut a strip of paper to 1 1/2x6 and adhere just under the top patterned paper.


7. Cut a 6 inch length of matching ribbon and adhere to center strip.


8. Cut two ovals: 2 1/2 and 3 inches. Adhere 2 1/2 oval to larger one. Use stickers, rub-ons, die cuts, or your computer to spell out the name of your blog and adhere to top oval.


9. Cut or punch 4 flowers: 1 1/2 and 2 inches. I used the Walk in my Garden Cricut cartridge to cut these.


10. Adhere title oval using pop dots to the right of the cover. Arrange the flowers around the oval. I used pop dots on 2 of mine. Bend flower petals up slightly for added dimension.

11. Cut a length of ribbon, tie in a bow, and adhere to left side of page as shown.

12. Now that you have a super cute cover, layer your worksheets underneath, then add your back cover.

13. Have spiral bound at your local copy center.

See, told you. Easy and cute!


Blog Planner

Friday, June 4, 2010

Father's Day Gift Idea: Treat of the Month Club

Here is a fun and easy gift, perfect for any man on your Father's Day list this year. After all, what dad wouldn't want a year's worth of yummy treats? Here's the how to:

1. Obtain a cute container. I found this one at Michael's for $3. Then I just cut a piece of scrapbook paper down & slipped it inside of the pail. Next, attach a few lengths of ribbon to each side of the handle.

2. Fill with a stack of dad's favorite cookies or other treat.

3. Print out the recipes and the gift tags found below.

4. Attach the gift tag with ribbon. It reads: "Congratulations! You have been enrolled in the Treat of the Month Club! As a member, you will receive a delicious, home-baked treat each and every month for the next year! Happy Father's Day!

The next page has the months listed along with the corresponding treat and the day of the month dad can expect his treat.

5. Give to dad and watch his eyes light up with joy! OK, maybe not, but it is a nice change from the standard necktie.


Saturday, May 1, 2010

Cupcake Card Tutorial

I used paper from My Mind's Eye Dreamy 2 collection for this card.


1. Cut the background piece 4 1/4 x 5 1/2 and adhere to card.

2. Cut a 2 x 5 1/2 strip of polka dot paper. Put your adhesive on the back, but don't attach just
yet.

3. Cut a 14 inch length of matching ribbon and run it along the back side of the polka dot strip.
Lay it so the ends of the ribbon are near the bottom of the card. Adhere strip to the card
toward the left side.

4. Tie the ribbon in a knot.


5. Cut a 3 inch scalloped rectangle from dark pink cardstock. (I used the Winter Woodland
Cricut Cartridge.) Adhere to card with pop dots.


6. Cut a 3 inch cupcake base from brown cardstock. ( I used the From My Kitchen Cricut Cartridge in the blackout setting.) Trim off the cherry.

7. Cut a 3 1/2 inch cupcake frosting from pink patterned paper. Adhere to cupcake bottom. Adhere cupcake to scalloped rectangle.

8. Hole punch 7 holes from raspberry colored cardstock and adhere to frosting.